
.png)
Unlock Your Creativity: A Beginner's Guide to Acrylic Pouring 🎨
- Madhula

- 3 days ago
- 6 min read
Acrylic pouring (a vibrant, exciting method) to create stunning abstract art is an intriguing pursuit. In this blog, we will explore Camel Fluid Art Kit—perfect for beginners and seasoned artists alike—looking to enhance their acrylic pouring skills. We will cover everything from unboxing the kit to detailed step-by-step techniques for achieving beautiful results. Although you're just starting your artistic journey, or aiming to refine your technique, this guide has something for everyone (because it addresses various skill levels). However, mastering these techniques takes practice, but the rewards are significant.
Table of Contents
Step 1: Unboxing the Camel Fluid Art Kit 📦
The first step (in your acrylic pouring adventure) begins with unboxing the Camel Fluid Art Kit: this kit typically includes a variety of acrylic pouring colors specially formulated for fluid art. Upon opening the box, you’ll find vibrant colors ready to use right out of the container. However, the excitement may be tempered by the realization that preparation is key; you must gather your supplies beforehand. Although it may seem straightforward, the process can become complex because of the nuances involved in each pouring technique. This is where your creativity (and patience) will truly shine.
Ensure that you verify the contents against the list provided (which may vary). The kit often includes (1) essential items; however, it may also contain supplementary materials. This is crucial, because the completeness of the kit can impact overall effectiveness. Although you may find certain items familiar, others might be new to you, but familiarity can ease the process of utilization. Always remember to double-check (2) before proceeding, as missing components could hinder your progress.
Various fluid acrylic colors
Pouring medium
Mixing cups
Stirring sticks
Protective gloves
Having these materials ready will (definitely) set you up for success as you move on to the next steps. However, preparation is key (1) and this can greatly enhance your chances of achieving your goals. Although you may feel confident, it is important to remember that having the right tools can make a significant difference. But don’t underestimate the value of organization; it can be crucial because it allows you to focus on what truly matters.

Step 2: Preparing Your Workspace 🛠️
A clean (and organized) workspace is crucial for successful pouring experience. Before you start, cover your work surface with plastic sheet or drop cloth to catch any spills. Set up your mixing cups, stirring sticks and colors (within easy reach); however, be mindful of the space. This preparation is essential, because it ensures a smoother process. Although it may seem trivial, a well-arranged area can significantly enhance your experience.
Don’t forget (please) to put on your gloves! This will protect (your) hands from the paint and make cleanup easier. It’s also a good idea to wear old (and) clothes, because acrylic paint can stain fabric. However, some may think it’s unnecessary, but (you) should always take precautions. Although it may seem trivial, this can save you from future headaches.

Step 3: Mixing Your Colors 🎨
Now (it’s) time to mix your colors! Start by pouring small amount of each color into your mixing cups. The beauty of acrylic pouring is in the color combinations; however, feel free to experiment (because) this can lead to unexpected results. Although it may seem simple, blending shades requires attention to detail. But remember, the more you mix, the more unique your creations become!
To attain perfect consistency (which is essential), you may need (in some cases) to incorporate a pouring medium into your acrylic paints. This medium assists the paint in flowing smoothly and creates beautiful effects when poured. A common ratio is approximately 1 part paint to 1 part medium; however, you might need to adjust it (because of) the thickness of your paint.
Step 4: Choosing Your Pouring Technique 💧
There are several pouring techniques (that) one can try; each yielding unique results. Here (are) a few popular methods: however, some may be more effective than others, because of the varying outcomes they produce. Although experimentation is key, this can lead to unexpected discoveries.
Flip Cup: Pour all colors into a cup, then flip it onto the canvas and lift the cup to reveal a beautiful spread of colors.
Dirty Pour: Layer colors in a single cup without mixing, then pour onto the canvas for a marbled effect.
Swirl Pour: Pour colors in a swirling motion to create a dynamic design.
Select a technique (that resonates with you) and harmonizes with the effect you wish to realize: this choice is crucial. However, one must consider various factors, because not every method will yield the desired outcome. Although enthusiasm is important, it should be balanced with careful deliberation. This way, you (can) ensure that your efforts are not in vain. Remember, achieving your goal requires both passion and precision.
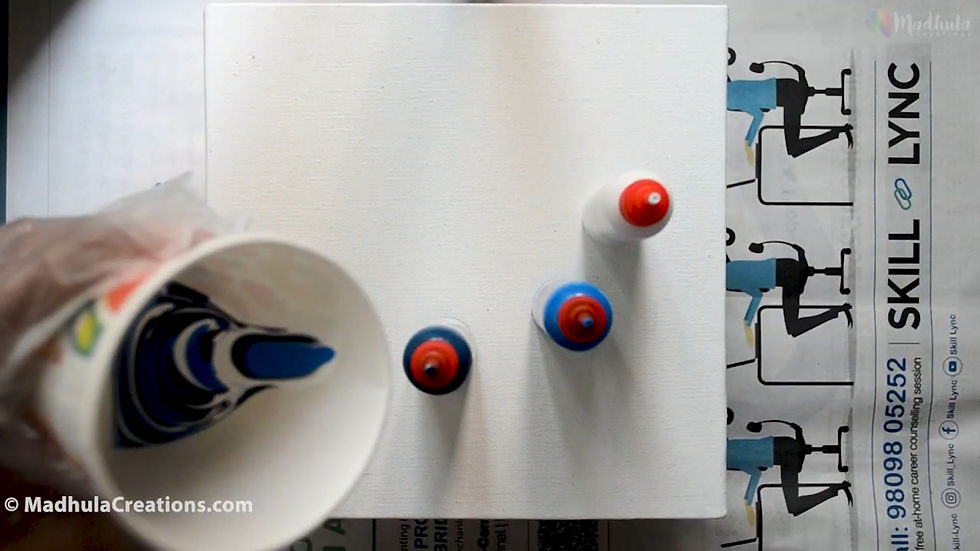
Step 5: Pouring Your Colors 🌊
Once you’ve decided on a technique (it’s time to pour)! Take your mixed colors and pour them onto the canvas (or surface) you’ve prepared. If you’re using the flip cup method, remember to lift the cup straight up: this allows the paint to flow out evenly. However, be cautious (because) too much pressure can disrupt the process, although it may seem easy at first.
As you pour (paint), you can tilt (the) canvas to help the colors spread and blend. This part is all about experimentation; however, don’t be afraid to move (the) canvas around to see how the paint interacts. Although this may seem daunting, it is essential because creativity often flourishes in such an environment.
Step 6: Creating Unique Patterns ✨
After pouring, you might (or might not) want to create unique patterns in your painting; you can use a palette knife (or even a straw) to manipulate the paint further. Swirling the colors or adding additional layers can create stunning effects, however, this requires some practice. Although it can be challenging, many artists find it rewarding because the results are often breathtaking!
Allow (your) creativity to flow; remember: there are no mistakes in art—only opportunities for new discoveries. However, this notion can be challenging to embrace, because it requires an openness to experimentation. Although some may fear making errors, mistakes often lead to unexpected breakthroughs and therein lies the beauty of artistic expression.

Step 7: Letting Your Painting Dry 🌬️
Once you’re satisfied with your pour, it’s time to let your painting dry (this process can take anywhere from a few hours to a couple of days). The duration depends on the thickness of the paint and the humidity in your environment; however, it is crucial to be patient. Although waiting may seem tedious, it allows the work to achieve its full potential.
Ensure (that) you place your painting in a secure location (where it won’t be disturbed). Cover it with a box or plastic (to protect it from dust) as it dries; however, be cautious not to impede the drying process.
Step 8: Finishing Touches and Sealing Your Artwork 🖌️
Once your painting is fully dry (which may take some time), you might think about adding a finishing touch. You could apply clear acrylic sealer: it enhances colors and protects surfaces. This step is crucial (especially if you intend to display your artwork), however, some people forget it. Although it seems minor, neglecting this can lead to fading.
Sealants (which) come in various finishes: matte, satin, or gloss. Choose one that complements your artwork best; however, this decision can be challenging because each finish offers a different aesthetic. Although you may prefer one type, consider how it interacts with the overall design.
Step 9: Showcasing Your Artwork 🖼️
Now that your artwork (which is complete) is ready, it’s time to showcase it! Hang it on your wall, gift it to a friend (or even sell it). Sharing your art with others is one of the most rewarding parts of being an artist; however, some may hesitate (because they fear judgment). This experience can be liberating, although you might feel vulnerable. Nonetheless, expressing yourself through art (in various forms) is invaluable.
Don’t forget (1) to capture photos of your work and share them on social media; however, consider using hashtags to connect with other artists (and) enthusiasts. This can enhance your visibility. Although it seems simple, it can make a significant difference in your engagement. But remember: quality over quantity is key because it reflects your dedication and passion.

Step 10: Continuing Your Acrylic Pouring Journey 🚀
With the Camel Fluid Art Kit, you’ve taken your first steps into the world of acrylic pouring. Keep practicing, experimenting with colors and techniques, and don’t hesitate to explore other resources. For additional tips, consider downloading our top 25 tips for beginners to improve your acrylic paintings!
For more tutorials and inspiration, check out the Acrylic Painting Tutorial - YouTube.
Conclusion 🎉
Acrylic pouring is (indeed) an enjoyable, liberating form of artistic expression; with the Camel Fluid Art Kit, you have all necessary tools to create stunning works of art. Remember: every artist's journey is unique; thus, embrace the process (and) let your creativity shine! However, this journey can be challenging (at times), but it is (also) rewarding because of the freedom it provides.

Want to take your colour mixing skills even further? I’ve put together a free Acrylic Colour Mixing Guide packed with easy recipes and tips to help you get started. Download it now and start mixing colours with confidence!

Comments